Adding Comments Section to Jekyll Site with Giscus

Introduction
One of the reasons for starting this blog is to have a space where I can share my thoughts, ideas, and insights from both my professional and private life. Posting my thoughts publicly on this platform is a great way to express myself, but another key reason is to connect and interact with like-minded people. One way of doing that is by adding a way for readers to comment on my articles.
This website is built on Jekyll using the Chirpy theme, and there are many ways to add a commenting system to a Jekyll site. In this article, I’ll go through why I chose Giscus, the steps to get it up and running, and how to customize it to fit your site.
Why I Chose Giscus for my comments feature
There are several ways to add comment functionality to a Jekyll site. Some of the main alternatives are Disqus, Staticman, and Giscus.
Disqus seems like the most straightforward option, offering an easy setup and a simple way for viewers to log in or create an account to leave comments. However, I wasn’t comfortable with the privacy aspects of using Disqus, and I also wanted to avoid relying on third-party services.
Staticman was another interesting option, but after some research, I found that the repository hasn’t been actively maintained in a few years. Because of this, I was hesitant to invest time in figuring out whether it would still work reliably.
Giscus, however, caught my eye as a really nice alternative. It can be customized to fit with emoji interactions and offers great overall customization options. One of the main drawbacks, in my opinion, is that it requires a GitHub account. I knew that only a small percentage of my blog readers would actually use a GitHub account, but I decided to go with Giscus anyway. The simplicity of setting it up was appealing, and I wanted to give it a try.
The pros and cons I see are:
- ✅ Open source
- ✅ Reduce spam
- ✅ Privacy-friendly
- ✅ Visual Customizable
- ✅ Emoji interaction feature
- ❌ Require a GitHub account
What is Giscus
Giscus is a a comments system powered by GitHub Discussions. Let visitors leave comments and reactions on your website via GitHub - That’s it!
A few articles that helped inspire my choice of Giscus 💡
Guide to setting up Giscus Comments for Jekyll Site
Step 1: Create a new Github repository
Create a new Github repository which will be used to store comments and reactions.
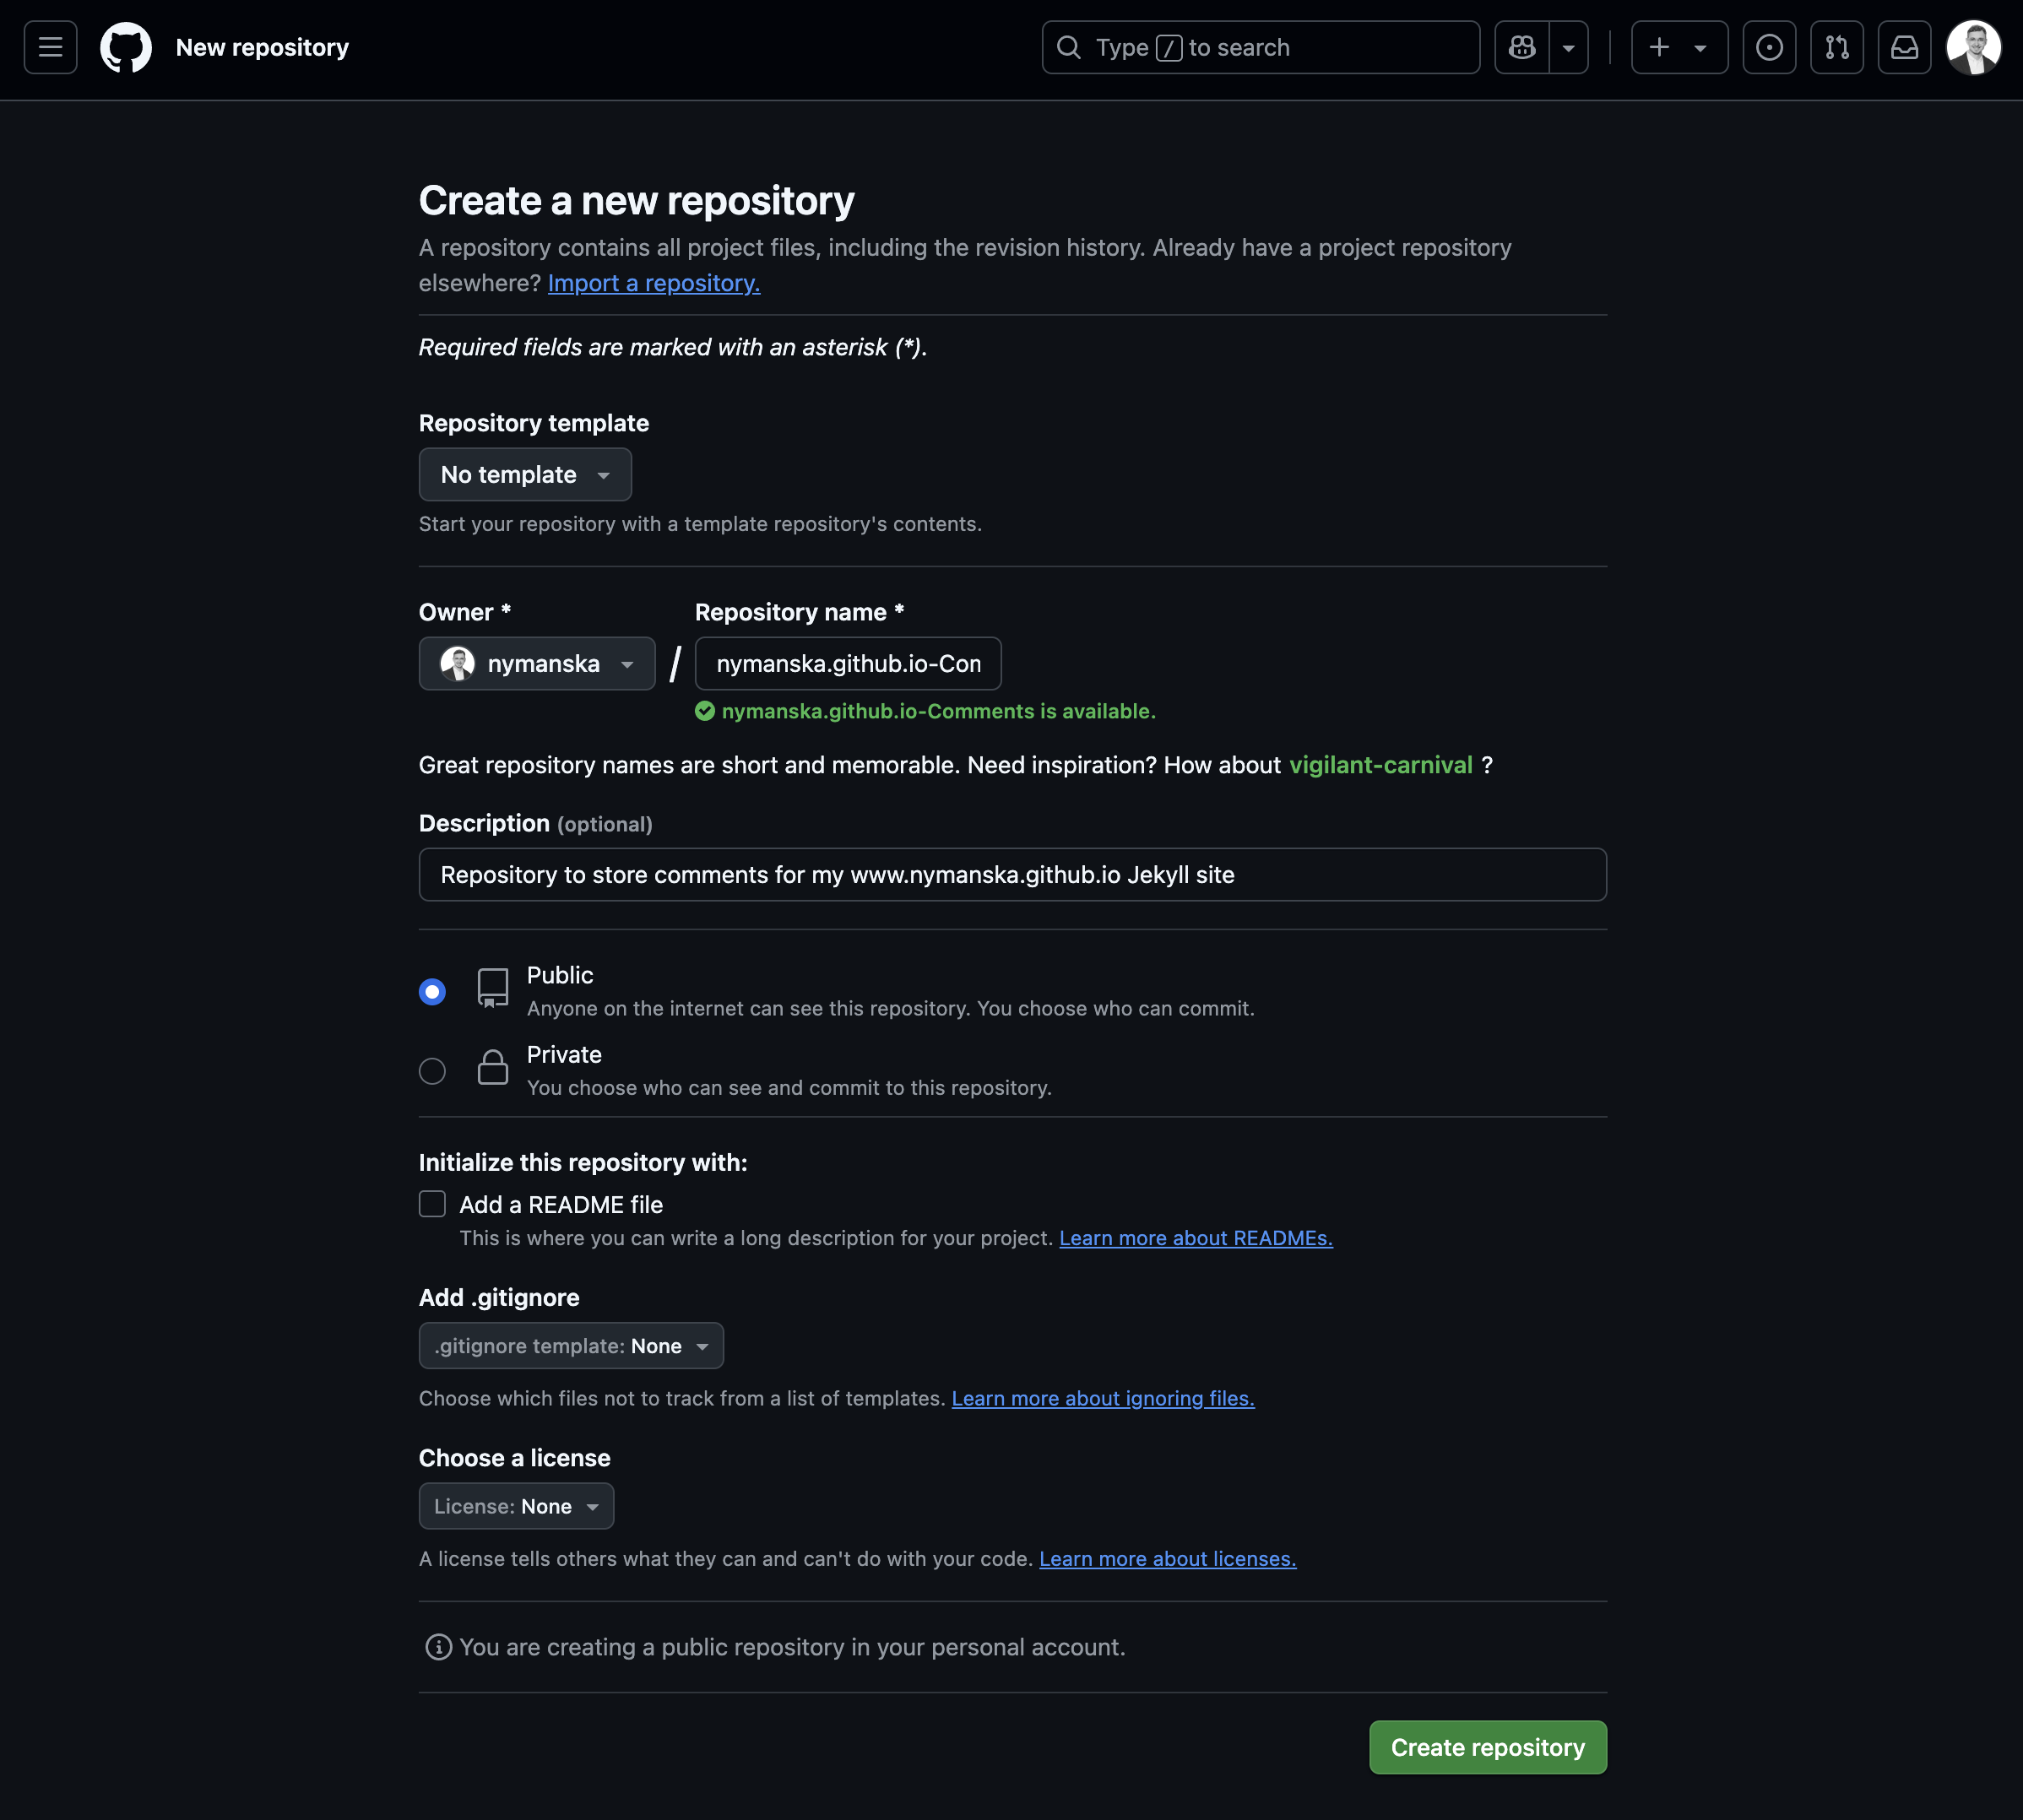 New repo
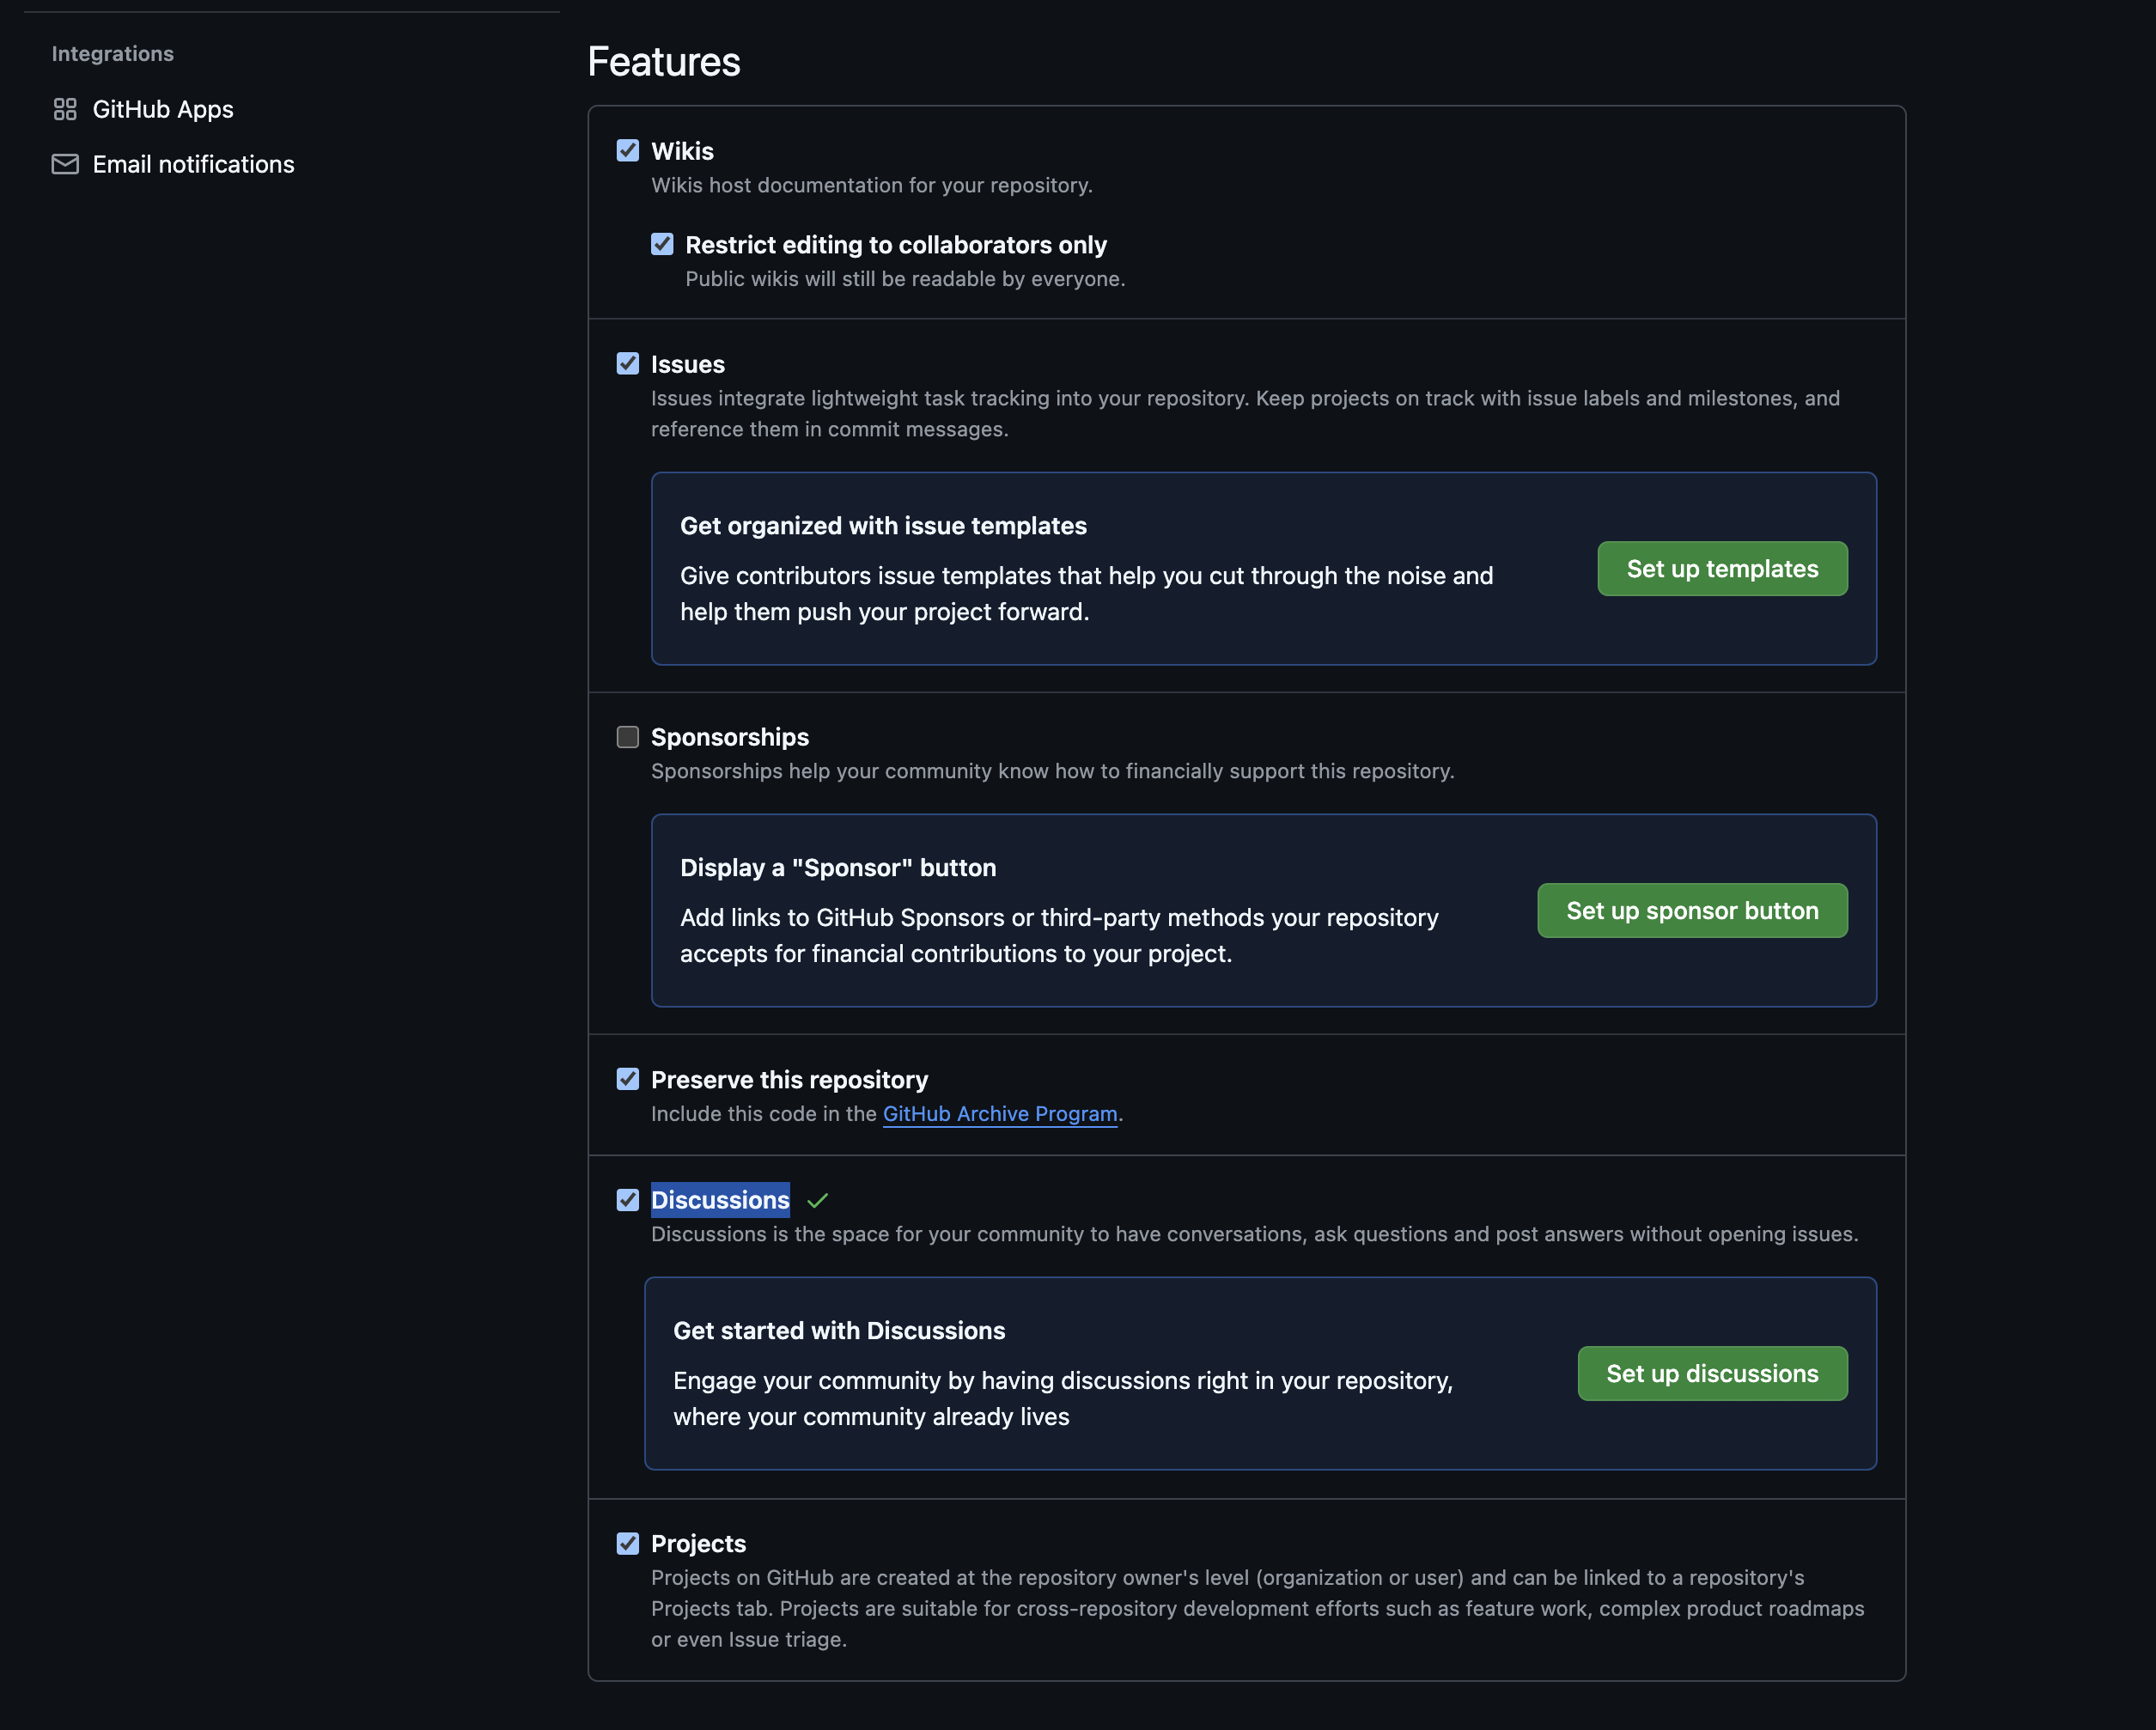
Enable Discussions feature in repository settings
Step 2: Install Giscus App at your new repository
- Head over to Github marketplace: https://github.com/marketplace/giscus
- Click the Install it for Free button in the bottom of the page
- Review the “Free” order, add billing information and click the Save billing information
- Click Complete order and begin installation button
- Select the repository where you want to store the comments (see Step 1), and click Install.
- Done!
Step 3: Enable Giscus Comments in your website repository
- Head over to Giscus App to create a customization script which will be used in your website’s page
- Add the new repository name used to store the comments (for me this was: nymanska/nymanska.github.io-Comments)
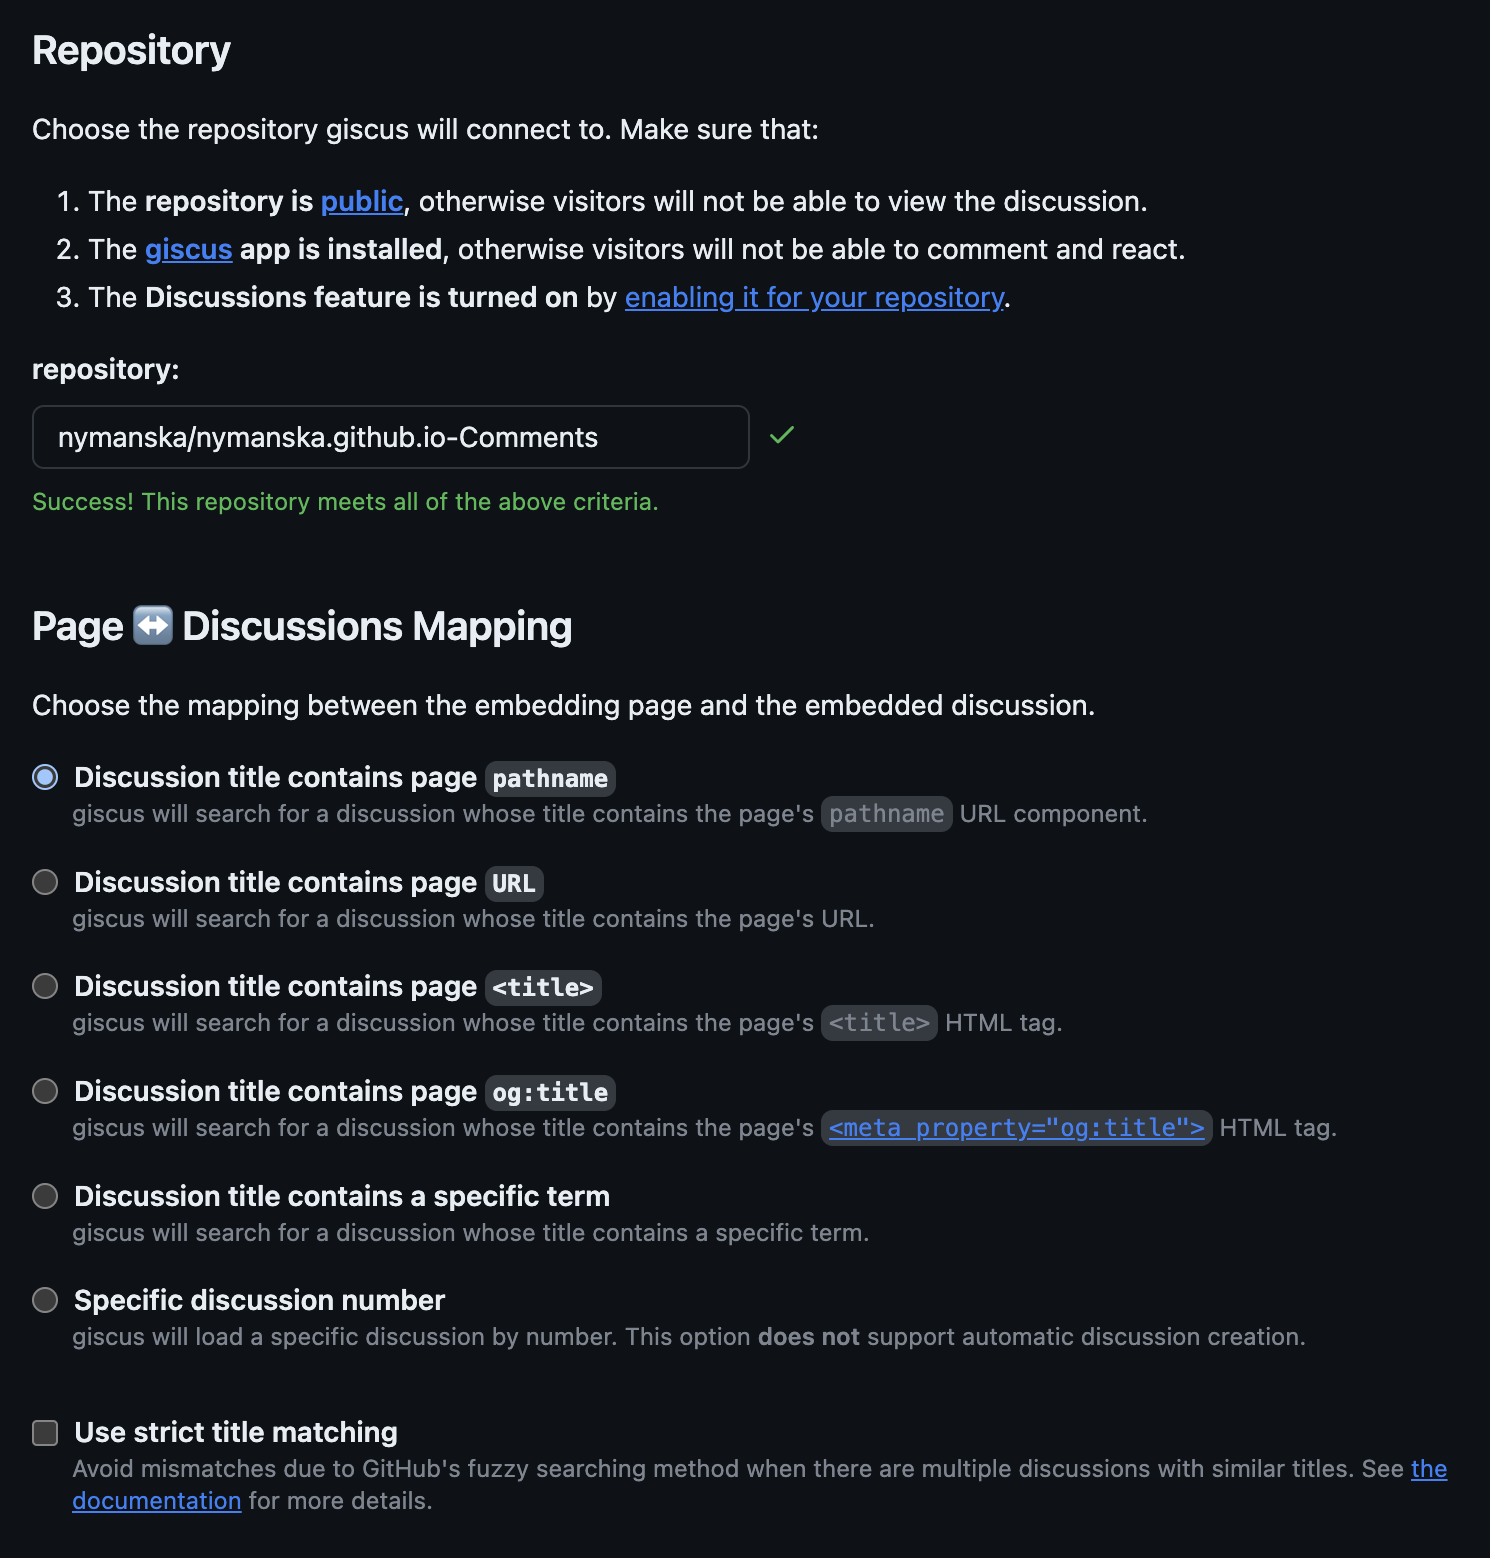
- Add customization features you would like for your website such as placement of comment box, color theme, enable reactions, and more.
- The Giscus.app page will automatially generate your Giscus script. Mine looks as below:
1
2
3
4
5
6
7
8
9
10
11
12
13
14
15
<script src="https://giscus.app/client.js"
        data-repo="nymanska/nymanska.github.io-Comments"
        data-repo-id="R_kgDOOI8GbQ"
        data-category="General"
        data-category-id="DIC_kwDOOI8Gbc4CoDnd"
        data-mapping="pathname"
        data-strict="0"
        data-reactions-enabled="1"
        data-emit-metadata="0"
        data-input-position="top"
        data-theme="preferred_color_scheme"
        data-lang="en"
        crossorigin="anonymous"
        async>
</script>
- Add the Giscus script to your website / blog My site is built with the Chirpy Theme which fortunately already has built-in support for Giscus comments defined in the _config.yml file.
If you are using a different theme you might want to add the script in either your config, post or other file.
Add the Giscus script information in the _config.yml file. 
- Add the Script from Step 4 in the bottom of each blog post. There might be a better way of doing this without having to post the scrip in every blog post but I haven’t figured out how to make that work yet.
Step 4. Try it out!

Final Words
After researching different options for adding comment functionality to my blog, I decided that Giscus was the right choice for me, and I’m looking forward to trying it out over the next couple of months.
Are you using a different comment system for your Jekyll site? I’d love to hear about your experiences with other solutions or if this article was helpful for you.
Feel free to share your thoughts - and if you want to test out my new comment section, go ahead and leave a comment below! 👇